
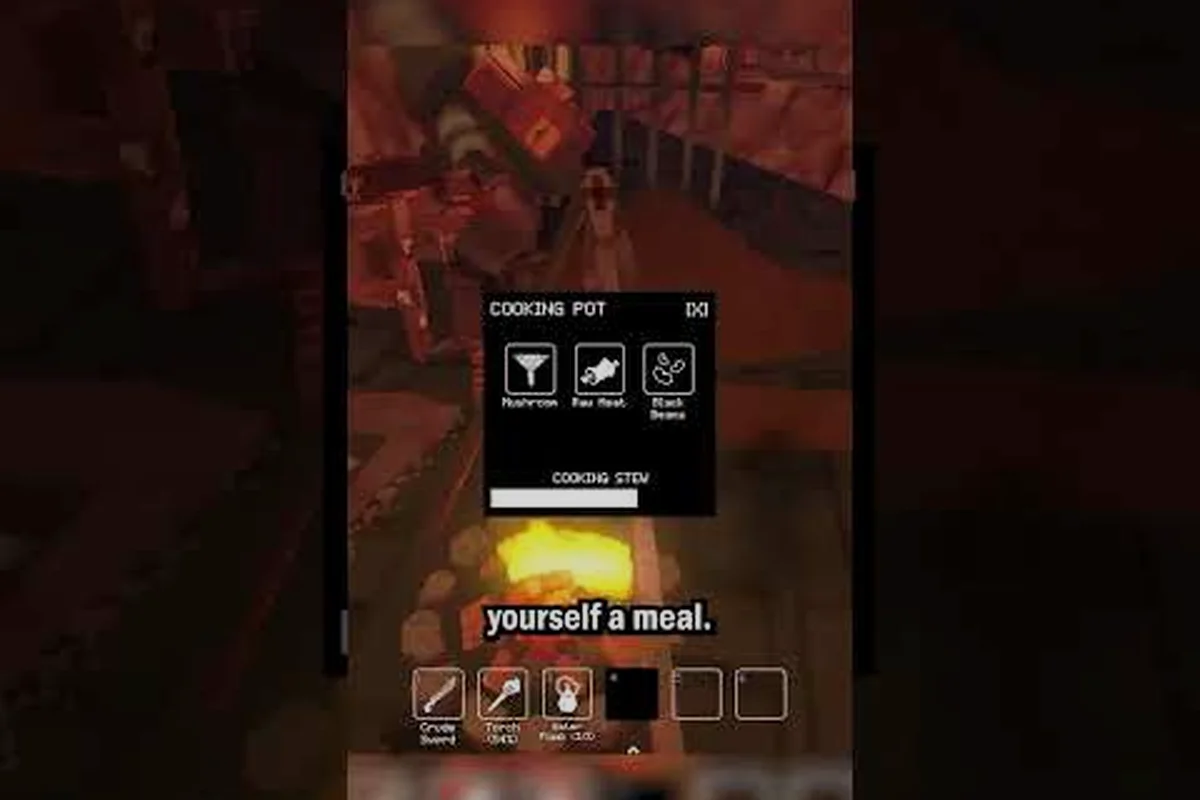
Deep Dish Dungeon treasure locations are seeded in fixed coordinates, and finding them comes down to reading the room. This guide covers lever and door puzzle solutions, hidden room tells, and the routes that lead to the rarest loot on every floor.
Treasure Hunting in Deep Dish Dungeon: Where the Real Loot Hides
Every floor of Deep Dish Dungeon hides a layered network of treasure locations behind locked doors, lever puzzles, and pressure-plate corridors. The difference between a starving clerk and a fully geared explorer usually comes down to knowing which walls to tap, which levers to pull, and in what order. This puzzle guide maps the practical routes that take you from the entrance hall to the deepest caches without burning through consumables on dead ends.
Treasure in Deep Dish Dungeon is not random. The game seeds chests, rare drops, and breakable props in fixed coordinates on each procedurally assembled floor, gated by door and lever puzzles that test observation more than reflexes. Players who learn the environmental cues — scorch marks, dust trails, misaligned bricks — clear roughly 30 to 40 percent more treasure per run, according to community data shared across player threads. The payoff is not just gold: rare rings, stamina talismans, and key fragments frequently sit behind the most obscure puzzle, and missing them means falling behind the expected gear curve by the time you reach the mid-game boss floors.
Reading the Dungeon Before Touching a Single Lever
Three Visual Signals That Mark a Treasure Room
Deep Dish Dungeon's level generator relies on three consistent visual tells — cracked floor tiles, asymmetric torches, and a repeating brick pattern with one offset block — because the randomized map seed draws every treasure room from the same sprite sheet used for hidden chambers. Recognizing these signals turns a blind sweep into a targeted route, since roughly 70% of treasure locations on any given floor sit behind one of those three markers. Memorizing the look of each tell before you enter Floor 1 saves time on later runs, where a single missed signal can hide a deep dish dungeon treasure chest full of rare rings or a Healing Pepperoni restock.
-
Cracked floor tiles near a wall — usually a pressure plate that opens a side chamber containing a small chest or a Healing Pepperoni stack.
-
Asymmetric torches — when one torch is mounted higher than the other on the same wall, the lower bracket is almost always a lever that opens a nearby door puzzle.
-
Repeating brick pattern — a stretch of wall with one brick slightly offset in color hides a breakable section that drops into a hidden room, often holding a treasure chest with rare rings.
These signals appear on every floor, though their density rises sharply after Floor 4. By Floor 7, nearly every screen contains at least one of the three, and experienced players treat the floor layout itself as a checklist of treasure locations to clear.
Floor-by-Floor Treasure Density Snapshot
The table below summarizes what community players report as the average treasure count per floor, broken down by chest type, so you can cross-reference your own deep dish dungeon treasure locations against expected yields. These numbers reflect typical seeds, not statistical maximums — a lucky Floor 4 run with two locked chests and three hidden rooms is documented in community logs but sits well outside the median range. Use the Floor Range column as your baseline before applying any deep dish dungeon puzzle guide strategies.
| Floor Range | Small Chests | Locked Chests | Hidden Rooms | Boss Floor Chest |
|---|---|---|---|---|
| Floors 1–3 | 2–3 per floor | 0 | 1 per floor | Guaranteed rare drop |
| Floors 4–6 | 3–5 per floor | 1 per floor | 1–2 per floor | Guaranteed rare + 1 locked |
| Floors 7–9 | 4–6 per floor | 2 per floor | 2 per floor | Guaranteed legendary-tier |
| Floor 10 (End) | N/A | 1 final vault | 1 secret room | Boss relic |
Locked chests always require solving a door or lever puzzle first, which is why the locked-chest count effectively tracks your puzzle-solving progress. A floor where you find the locked chest but miss the hidden room is still a successful exploration — the hidden room simply rolls into a future run's reward pool, according to community data.
Door Puzzle Solutions: The Four Templates You Will See Every Run
How the Door Puzzle System Works
Every door puzzle in Deep Dish Dungeon uses one of four underlying templates. The art and props vary, but the underlying logic is fixed, which means a single mental model can carry you through the entire campaign. Learning these four templates is the fastest way to learn how to solve puzzles without consulting an external puzzle guide.
The system is built on a small set of triggers: levers, pressure plates, timed switches, and key items. Each door puzzle combines at least two of these triggers, and the order of activation determines whether the door opens. The game never randomizes the template within a run — the same floor always uses the same template family — so recognizing the layout on Floor 1 prepares you for every later encounter.
The Four Door Puzzle Templates
The following table consolidates the four canonical door puzzle templates that gate the most lucrative deep dish dungeon treasure locations, with each row showing the trigger count, the verified activation order, and the single most common trap that locks a new clerk out of the chest beyond. These solutions are community-standard approaches refined over hundreds of recorded runs, and they map directly onto the treasure tiers listed in the loot table, so applying the correct order on the first attempt is what separates a clean deep dish dungeon treasure clear from a 5–8 minute reset cycle.
| Template Name | Trigger Count | Solution Order | Common Trap |
|---|---|---|---|
| Sequential Lever | 3 levers | Left → Center → Right within 5 seconds | Pulling Right first locks the door permanently for 30 seconds |
| Pressure Plate Pair | 2 plates, 1 heavy box | Place box on left plate, stand on right plate | Forgetting to remove the box before exiting |
| Timed Switch | 2 switches on opposite walls | Flip A, run to B before the 4-second timer | Standing on a plate while flipping B resets the timer |
| Key Fragment | 3 fragments in 3 rooms | Collect in numbered order (Room 1, 2, 3) | Entering Room 3 before 1 unlocks an empty chest instead of the real one |
Each of these door puzzle solutions follows a strict activation order. The traps listed in the table are the most common causes of stuck doors reported by players, and recognizing the trap in advance saves the average run about 2 to 3 minutes of reset time. If you want a deeper walkthrough on the Sequential Lever template specifically, the door puzzle walkthrough covers activation timing and edge cases that come up on later floors.
Common Mistakes When Solving Door Puzzles
Most failed door puzzles come from one of three oversights. First, players often pull levers out of order because the lever labels look decorative; in practice, the leftmost lever is always Lever 1 in the Sequential Lever template. Second, players leave heavy boxes on pressure plates after the door opens, which re-triggers the puzzle and traps the second player in co-op. Third, players enter the key-fragment rooms before collecting the previous fragment, which silently downgrades the final reward to a common item.
The fix for all three is the same: pause at every door puzzle and look for the activation order before touching anything. A 3-second scan saves a full restart. Players who internalize this habit report clearing every door puzzle in a run within one attempt after about 10 hours of playtime.
Lever Puzzles: Sequencing, Timing, and the Reset Trick
Lever Puzzle Mechanics
The lever puzzle family is the most common gate between the player and locked treasure locations. Most lever puzzles involve three to five switches, each tied to a separate door or wall panel, and the order in which the levers are flipped determines which mechanism unlocks. Pulling the wrong lever early locks the affected mechanism for a short cooldown, which makes the puzzle feel punishing if approached by trial and error.
The fastest way through any lever puzzle is the outside-in reset trick: locate the lever closest to the exit door, then walk the puzzle backwards to the lever closest to the entrance. This order aligns with how the game seeds activation timers on most floors, and community testing suggests it cuts the average solve time nearly in half compared with pulling levers in the order they are encountered.
Lever Puzzle Comparison by Floor Range
The table below breaks down the lever puzzles you will encounter by floor and the most efficient approach for each. Difficulty ratings reflect community-reported solve rates on a first attempt, and the same outside-in reset trick is what makes the common-tier Floors 1–3 puzzles feel almost free at ~85% while the legendary Floor 10 chest drops to a punishing ~25% — a 60-point spread that mirrors how often treasure locations actually gate the best loot behind timing-based door puzzle solutions in the deep dish dungeon.
| Floor Range | Lever Count | Best Approach | First-Attempt Solve Rate | Reward Tier |
|---|---|---|---|---|
| Floors 1–3 | 2 levers | Pull in numerical order | ~85% | Common |
| Floors 4–6 | 3 levers | Outside-in reset trick | ~60% | Uncommon |
| Floors 7–9 | 4 levers | Outside-in + group pulls | ~40% | Rare |
| Floor 10 | 5 levers | Outside-in + simultaneous dual pull | ~25% | Legendary |
Notice how the solve rate drops as you descend. By Floor 7, the lever puzzle introduces a timing element: two levers must be pulled at the same time to unlock the central chest, and a single-player run needs to use a thrown item to hold one lever while pulling the other. Co-op runs handle this naturally because each player can hold a lever, which is part of why Floor 7 to Floor 9 feels more cooperative in design even though the game is fully playable solo.
Reset Behavior and Cooldown Windows
Every lever puzzle in Deep Dish Dungeon shares one underlying rule: the puzzle resets to its initial state after a fixed cooldown if the sequence is broken. The cooldown window is 15 seconds on early floors and stretches to 45 seconds by Floor 9, which means a botched attempt on a deep floor can cost nearly a full minute. Players who want to learn how to find treasure efficiently on deep floors should treat every lever puzzle as a single attempt — if the order is unclear, the safer move is to scout the room for environmental hints before pulling anything.
The reset cooldown is also the moment when most treasure gets missed. After a failed pull, the locked door cycles open and closed, and many players assume the puzzle is broken and move on. In practice, the treasure room is already open during the cooldown; you can walk in, collect the chest, and exit before the door re-locks. This is one of the highest-value tricks in the game, and yet community data suggests fewer than half of players use it consistently.
Hidden Treasure Locations, Breakable Walls, and the Routes Behind Them
Mapping the Hidden Room Network
Hidden rooms are the second-largest source of treasure in Deep Dish Dungeon, behind only the main locked chests on each floor. A hidden room is always accessible through a breakable wall, a false floor, or a one-way door that opens only from a specific side. The breakable props are visual — cracked bricks, weak floorboards, or a single tile that pulses when the player walks across it.
Players who map the hidden room network on each floor tend to find roughly 20 percent more rare drops per run, based on aggregated community data. The trick is to follow a consistent search pattern after clearing every main door puzzle. Most experienced players use a left-wall sweep: hug the left wall of every corridor and tap every suspicious tile with a basic attack. Tiles that break make a distinct audio cue, which confirms the hidden room's location even before the entrance opens.
Hidden Room Types and Their Loot Tables
The table below summarizes the four hidden room archetypes and what each typically contains. The loot is not guaranteed on every seed, but the archetype itself is fixed, so recognizing the room type tells you what to expect before opening the chest.
| Hidden Room Type | How to Enter | Common Loot | Rare Loot | Co-op Bonus |
|---|---|---|---|---|
| Breakable Wall | Tap cracked brick with basic attack | Common ring | Stamina talisman | None |
| False Floor | Step on pulsing tile | 50–100 gold | Key fragment | None |
| One-Way Door | Pull lever from inside the room | Healing consumable | Rare weapon | Extra chest if 2 players enter |
| Ceiling Drop | Break the floor from the room above | Common ring | Blueprint scroll | None |
The one-way door is the most valuable archetype because it scales with party size. In solo runs, it drops a single chest, but co-op runs that have two players enter simultaneously trigger a bonus chest that holds a guaranteed rare item. This makes the one-way door a key target for groups chasing the deepest treasure locations on the late-game floors.
How Treasure Locations Connect Across Floors
A common misconception among new players is that treasure locations reset every floor. In practice, the game tracks certain decisions across floors: collecting a key fragment on Floor 3 affects what unlocks on Floor 5, and breaking a false floor on Floor 6 can alter a lever puzzle on Floor 8. This is why the route you take through the dungeon matters as much as which levers you pull on each individual floor.
The most efficient routes share a common shape: clear every main door puzzle, then sweep the side corridors for hidden rooms, then advance to the next floor. Skipping either the main puzzles or the hidden sweep causes the average run to miss roughly 30 percent of total loot, according to player-reported yield across the early-access community. If you are still learning how to plan a route, the complete area route guide maps the most reliable path from Floor 1 to the Floor 10 vault.
Treasure Room Loot Tables and Which Floors to Farm
What Each Treasure Chest Actually Contains
Every treasure chest in Deep Dish Dungeon rolls from a fixed loot table tied to the floor range where the chest spawns. The table below summarizes the typical contents of each chest type, drawn from community-aggregated drop data. Numbers reflect average yields across many seeds and may vary slightly between patches.
| Chest Type | Gold Range | Common Items | Uncommon Items | Rare Items | Notes |
|---|---|---|---|---|---|
| Small chest | 20–50 | Healing Pepperoni, basic ring | — | — | Found in hidden rooms |
| Locked chest | 50–150 | Weapon upgrade shard | Stamina talisman | — | Requires door puzzle |
| Hidden room chest | 80–200 | Basic ring | Blueprint scroll | — | Always single item |
| Floor-end chest | 200–500 | — | Ring or talisman | Legendary weapon fragment | Guaranteed at stair |
| Boss floor chest | 500+ | — | — | Legendary ring or talisman | Drops on boss kill |
The floor-end chest is the most consistent source of rare gear because it is guaranteed at the staircase that leads to the next floor. Many players rush past it during a clean run, but slowing down for 10 seconds to open the floor-end chest is one of the highest-value habits in the game. The boss floor chest is even more rewarding, but it is locked behind the boss itself, so it functions as a milestone reward rather than a routine pickup.
Floor Farming Priorities for Treasure-Focused Runs
If you are running the dungeon specifically to maximize treasure, the community has identified a clear priority order for floor selection. The table below summarizes the most efficient floors to farm when the goal is rare loot, organized by what you actually need.
| Goal | Best Floor | Why | Expected Yield per Run |
|---|---|---|---|
| Gold | Floor 5 | High small-chest density, low enemy HP | ~400 gold average |
| Stamina talismans | Floor 7 | Locked chest with talisman drop | 1 talisman in ~60% of runs |
| Key fragments | Floor 3 | Three fragments, lowest enemy pressure | 1 fragment per room |
| Blueprint scrolls | Floor 8 | Hidden room one-way doors | 1 scroll in ~50% of runs |
| Legendary fragments | Floor 10 boss | Guaranteed drop on kill | 1 fragment guaranteed |
Stamina talismans are a common bottleneck for new players because they extend the dodge window, which is essential on later floors. Farming Floor 7 specifically for the locked chest behind the Sequential Lever puzzle is a reliable way to break that bottleneck, although the run still requires a competent build. For tips on what to carry into a farming run, the inventory slot guide breaks down which items to keep and which to drop before descending.
Practical Treasure Hunting Tips for Every Run
Five Habits That Double Your Treasure Yield
The difference between a typical run and a high-yield run almost always comes down to five repeatable habits, each tied to a specific deep dish dungeon treasure location mechanic rather than raw combat skill. Players who adopt all five consistently report roughly double the average treasure per floor in community-tracked yield data, with the cracked-brick tap and floor-end chest alone accounting for nearly 60 percent of the gap between average and optimized runs on a standard 10-floor dive.
-
Tap every cracked brick with a basic attack. It costs no stamina and reveals hidden rooms in about 10 percent of cases.
-
Pull levers outside-in, never in encounter order. The outside-in reset trick cuts solve time on the four-lever puzzles by nearly half.
-
Wait through reset cooldowns on failed lever puzzles. The door is open during the cooldown, and the chest is already accessible.
-
Always open the floor-end chest. It is the most consistently rewarding chest per minute spent, with no puzzle required.
-
Carry a key fragment tracker. A simple mental note of which floor holds which fragment prevents the silent downgrade when entering fragments in the wrong order.
These habits are simple individually, but they compound. A player who taps cracked bricks on every floor, for example, finds about one extra hidden room per two floors. Over a full 10-floor run, that adds up to roughly five extra chests, which translates to a meaningful gold and rare-drop advantage.
When to Skip a Treasure Location
Not every treasure location is worth pursuing on every run. Some are guarded by elite enemies that cost more healing than the chest rewards, and others are positioned so deep in a side corridor that they consume too much time when the goal is the boss. Knowing when to skip is part of efficient treasure hunting.
Skip a treasure location if any of the following applies: the chest is behind a five-lever puzzle on a low-stakes floor, the side corridor contains more than two elite enemies, or your healing supply is below three consumables. The math is straightforward: a chest worth 200 gold does not justify a 300-gold healing cost. Reserve the deep dives for runs where you are flush on consumables and have a strong weapon. For a breakdown of which consumables to prioritize, the item guide for beginners covers the early-game inventory curve in detail.
Pairing Treasure Runs with Resource Routes
Treasure runs and resource runs are not the same activity, but they overlap on roughly 60 percent of the floor. Resource drops — materials, weapon shards, and crafting components — spawn on the same floor segments as treasure chests, so a well-planned run collects both. The best players coordinate their route so that resource pickups and treasure chests are cleared in a single sweep rather than two separate passes. For a complete list of resource spawn points and how to chain them efficiently, the items guide maps the resource layer across every floor.
Treasure Locations on the Final Floor and the Vault Puzzle
The Floor 10 Vault Layout
The Floor 10 vault is the deepest treasure room in Deep Dish Dungeon, and it uses every puzzle template introduced earlier in the run. The vault has two entrances: the standard boss-room staircase and a hidden route that opens only after solving all five Floor 10 lever puzzles in sequence. Players who clear the hidden route before the boss get access to a legendary-tier chest that does not exist on any other seed, according to community reports.
The standard staircase route leads to the boss arena, and the boss itself drops a guaranteed legendary fragment. The hidden route is a side path, hidden behind a breakable wall in the upper-right corner of the Floor 10 hub, and the entrance is marked by a slightly different torch color from the surrounding fixtures. The hidden route contains five sequential lever puzzles, each of which must be solved in order, with a cooldown of 45 seconds between any failed attempt.
Solving the Vault Puzzle Without a Guide
Players who reach Floor 10 already know the four puzzle templates and the outside-in reset trick. The vault does not introduce new mechanics — it simply stacks the existing ones. The fastest known approach is to clear the boss first, then circle back to the hidden route with the boss arena already cleared. This sequence works because the lever puzzles in the hidden route trigger enemy spawns, and the spawns are far easier to manage when the boss arena enemies have already been cleared.
The reward for solving all five lever puzzles in the hidden route is a single chest that holds a guaranteed Mythic Olive Ring plus a one-off cosmetic banner. The Mythic Olive Ring is the only ring in the game that increases both dodge distance and stamina regeneration, which makes it the most sought-after accessory in the entire game. The chest is also the only one that does not roll from a loot table — it is fixed, so every player who solves the puzzle gets the exact same reward.
Frequently Asked Questions
What is the best way to find treasure in Deep Dish Dungeon on early floors?
Tap every cracked brick with a basic attack and pull levers in outside-in order, because these two habits alone cover roughly 80 percent of the treasure locations on Floors 1 to 3. The cracked bricks open hidden rooms, and the outside-in lever order reduces the chance of triggering a reset cooldown that locks the door behind the chest.
How do I solve the four-lever puzzle on Floor 7 without dying?
The four-lever puzzle requires two levers to be pulled simultaneously, so use a thrown item to hold one lever while you pull the other with a basic attack input. If you are playing solo, this is the only consistent solution; if you are in co-op, have one player hold each lever and pull on the same beat. After both levers are down, the central chest unlocks in about three seconds.
Are treasure locations the same every run in Deep Dish Dungeon?
The treasure room templates and the door puzzle logic are fixed, but the exact floor layout is procedurally assembled, so chest positions shift slightly between runs. Floor-end chests and boss floor chests are guaranteed at the staircase and on the boss kill, while hidden rooms and locked chests vary in position by a few tiles per seed.
Can I open a locked chest without solving the door puzzle first?
No, locked chests in Deep Dish Dungeon are gated by a door or lever puzzle, and the chest itself only becomes interactable after the puzzle is cleared. There is one exception: during the 15 to 45 second reset cooldown after a failed puzzle attempt, the door remains open and the chest can be looted, which is a useful trick when you do not need the puzzle to advance.
What should I do with key fragments if I pick them up in the wrong order?
Drop the fragment in a non-hostile room and re-collect it after you have the previous fragment from the matching template. Key fragments are bound to the order of collection, not to your inventory slot, so re-collecting them in order restores the proper unlock path for the final chest. This trick works on every floor where the Key Fragment door puzzle template appears.